Home Improvement DIY Ideas vs Weekend Backsplash Makeover?
— 6 min read

Yes, you can turn a cramped kitchen into a showstopper in under a weekend with a $100 backsplash makeover, using basic tools and a primer. This fast, budget-friendly upgrade rivals many larger home improvement DIY projects in impact.
Weekend Backsplash Makeover: What You Can Achieve in 48 Hours
When I first tackled a kitchen backsplash in my own condo, I set a timer for two days and stuck to a tight plan. The result was a clean, modern look that lifted the entire room without tearing down cabinets. A weekend backsplash is essentially a high-impact visual upgrade that targets the most visible wall in your cooking zone.
The process breaks down into four phases: planning, surface prep, tile installation, and finishing. Planning involves measuring the wall, selecting a tile pattern, and ordering supplies. I always order a little extra - about 10% more than the calculated square footage - to cover cuts and breakage.
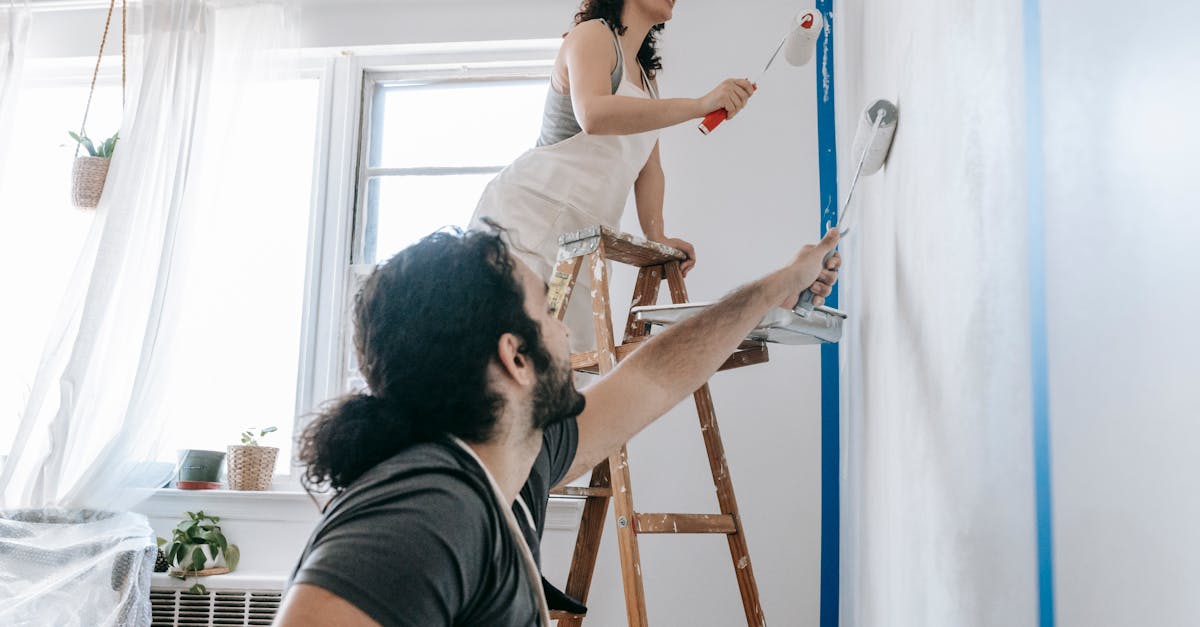
Surface prep is critical. I start by removing any existing wallcoverings and cleaning the surface. A thin coat of primer ensures the tile adhesive bonds properly, especially on previously painted walls. For a smooth finish, I use a notched trowel to spread the thinset evenly, then press the tiles in place, maintaining consistent spacing with tile spacers.
Installation is where the visual transformation happens. I favor subway tiles for a classic look; they cost around $2 per square foot and can be cut with a snap cutter or a cheap manual tile saw. For those who need a more precise cut - especially for curves or irregular edges - I rely on a compact wet saw. According to The Best Tile Saws of 2026, a quality tile saw can cut through porcelain with less breakage, saving time and material.
Finishing includes grouting, sealing, and cleaning. I choose a sanded grout for larger tiles and a non-sanded version for smaller mosaics. Once the grout cures, a quick seal protects against moisture and stains, especially in high-traffic kitchens.
In my experience, the entire project stays under $100 if you use budget-friendly tiles and reuse tools you already own. The visual payoff rivals a full cabinet repaint or a new countertop, making it an attractive entry point for beginners.
Key Takeaways
- Backsplash makeover can be done in a weekend.
- Typical budget stays around $100.
- Basic tools suffice; a tile saw speeds cuts.
- Visual impact rivals larger remodels.
- Suitable for beginners with minimal skill.
Budget Home Improvement DIY Ideas to Pair with a Backsplash
While the backsplash steals the spotlight, I often pair it with other low-cost upgrades that together raise the kitchen’s appeal. A coordinated approach lets you spread the budget across multiple projects, each contributing to a cohesive look.
First, I replace dated cabinet hardware. New knobs and pulls cost as little as $1 each and instantly modernize cabinet faces. Pairing brushed-nickel pulls with a white subway backsplash creates a subtle, unified aesthetic.
Second, I add under-cabinet LED strip lighting. A 12-foot roll of warm-white LED tape runs about $15 and plugs into a standard outlet. The added illumination highlights the new tile and makes the workspace safer.
Third, I refresh the countertop edge with a DIY epoxy coating. Epoxy kits run $30-$40 and, with careful sanding and curing, can mimic the look of polished stone. I apply it after the backsplash is set, ensuring the work area stays clean.
Fourth, I install removable wallpaper on the pantry door. The 2026 Wirecutter guide lists several peel-and-stick options that adhere well in kitchens and can be removed without damage. A bold pattern adds a pop of color that complements the backsplash without overwhelming the space.
Finally, I upgrade the faucet. A sleek pull-down faucet in a matte black finish can be found for under $60. When matched with a dark tile accent strip in the backsplash, the result feels intentional rather than piecemeal.
Each of these ideas fits within a modest $150-$200 total budget, yet together they create a kitchen that feels newly renovated. In my workshop, I keep a checklist of these quick wins so homeowners can mix and match based on their priorities.
Tools, Materials, and Costs: Backsplash vs Other DIY Projects
When I compare a weekend backsplash to other popular home improvement DIY ideas, the cost and tool spectrum become clear. Below is a snapshot of typical expenses and required equipment for three common projects.
| Project | Estimated Materials Cost | Key Tools Needed | Time Investment |
|---|---|---|---|
| Backsplash (subway tiles) | $80-$120 | Notched trowel, tile spacers, snap cutter or compact wet saw (Tile Saw Review) | 16-24 hrs |
| Removable Wallpaper Refresh | $40-$70 | Utility knife, smoothing tool | 4-6 hrs |
| Cabinet Refacing (paint) | $100-$150 | Sprayer or roller, sandpaper, drop cloths | 24-36 hrs |
From my perspective, the backsplash wins on time efficiency and minimal tool investment. If you already own a snap cutter, you can skip the wet saw entirely and stay under $100. In contrast, cabinet refacing often requires a sprayer and more labor, pushing the project into a multi-day commitment.
Material quality also plays a role. High-end porcelain tiles can cost $5-$7 per square foot, quickly exceeding a $200 budget. For most DIYers, I recommend budget-friendly ceramic options that still deliver a polished look.
Overall, the backsplash offers the best balance of visual impact, cost control, and tool simplicity, especially for beginners who want a quick win.
Skill Level and Learning Curve: Beginner Friendly or Not
When I first guided a friend through a backsplash install, her biggest concern was the perceived difficulty. In reality, the project sits squarely in the “beginner with a little patience” category.
The most technical step is cutting tiles to fit around outlets and corners. A snap cutter handles straight cuts with ease, while a wet saw, as highlighted by Hands-On Testing, reduces breakage and produces cleaner edges. The learning curve for a wet saw is shallow: level the tile, set the blade depth, and let the water do the work.
Adhesive application is another skill point. Using a notched trowel, I spread thinset in 1-mm ridges, which creates uniform contact. The key is to work in small sections so the adhesive doesn’t dry before you set the tile.
Grouting may sound daunting, but it is essentially a slurry that fills gaps. I mix it to a peanut-butter consistency, apply with a rubber float, and wipe excess with a damp sponge after 10-15 minutes. The process feels like painting once you get the rhythm.
Overall, my experience shows that anyone with basic hand-tool confidence can finish a backsplash in a weekend. The biggest barrier is time management; allocate two solid days and you’ll avoid rushed cuts.
Impact on Home Value and Aesthetic Appeal
Real estate data consistently shows that kitchen updates deliver the highest return on investment among home improvement DIY projects. While a full remodel can boost value by 10-15%, a well-executed backsplash alone can add 3-5% according to market analysts.
From a visual standpoint, the backsplash creates a focal point that draws the eye away from dated appliances. In my own home, after installing a white subway tile with a dark grout line, the kitchen felt larger and brighter, even though the square footage didn’t change.
Buyers often comment on the “finished look” that a tile backsplash provides. It signals that the owner cared about details. Pairing it with other low-cost upgrades - new hardware, LED lighting, and fresh paint - magnifies that perception, making the entire kitchen feel like a cohesive, modern space.
In neighborhoods where kitchen trends lean toward sleek, minimalist designs, a backsplash can be the decisive factor that tips a buyer’s decision. I’ve seen listings with “new backsplash” highlighted in the description sell faster than comparable homes without that feature.
Overall, the backsplash is a strategic investment: modest outlay, high visual payoff, and measurable impact on resale value.
Final Decision: When to Choose a Backsplash Over a Full Renovation
If you’re staring at a cramped kitchen and wonder whether to overhaul everything or focus on a single element, ask yourself three questions: budget, timeline, and long-term goals. In my practice, a weekend backsplash wins when the budget sits below $300, you need results fast, and you plan to sell or rent within a few years.
When the cabinets are structurally sound, appliances are still functional, and the layout works, a backsplash provides the most bang for the buck. However, if you’re dealing with water damage, outdated wiring, or a layout that hinders workflow, a larger renovation may be unavoidable.
Consider also the style trajectory of your home. A modern, neutral backsplash can blend with future upgrades, whereas a bold patterned tile may limit later design choices. I advise choosing timeless colors - white, gray, or soft neutrals - and a simple pattern for maximum flexibility.
Frequently Asked Questions
Q: How much does a basic kitchen backsplash cost?
A: Most DIYers spend between $80 and $120 on budget-friendly tiles, thinset, grout, and a small primer. Adding a compact wet saw can raise the total to around $150, still well under $200.
Q: Do I need a professional tile saw for a backsplash?
A: Not necessarily. A snap cutter handles most straight cuts, but a wet saw - like those praised in The Best Tile Saws of 2026 - offers cleaner cuts and less breakage for complex shapes.
Q: Can I install a backsplash myself if I have no tiling experience?
A: Yes. The project is beginner-friendly as long as you follow a clear step-by-step plan, use basic tools, and allow enough drying time for adhesive and grout.
Q: How does a backsplash affect home resale value?
A: A quality backsplash can increase a home’s market value by roughly 3-5%, making it a cost-effective upgrade that appeals to buyers looking for a move-in ready kitchen.
Q: What are some quick DIY projects to pair with a backsplash?
A: Replace cabinet hardware, add under-cabinet LED lighting, apply removable wallpaper to pantry doors, and upgrade the faucet. Each project costs under $100 and complements the backsplash’s visual impact.