
Avoid Summer Mold: Home Improvement DIY vs Pro Failure
— 7 min read
Avoid Summer Mold: Home Improvement DIY vs Pro Failure
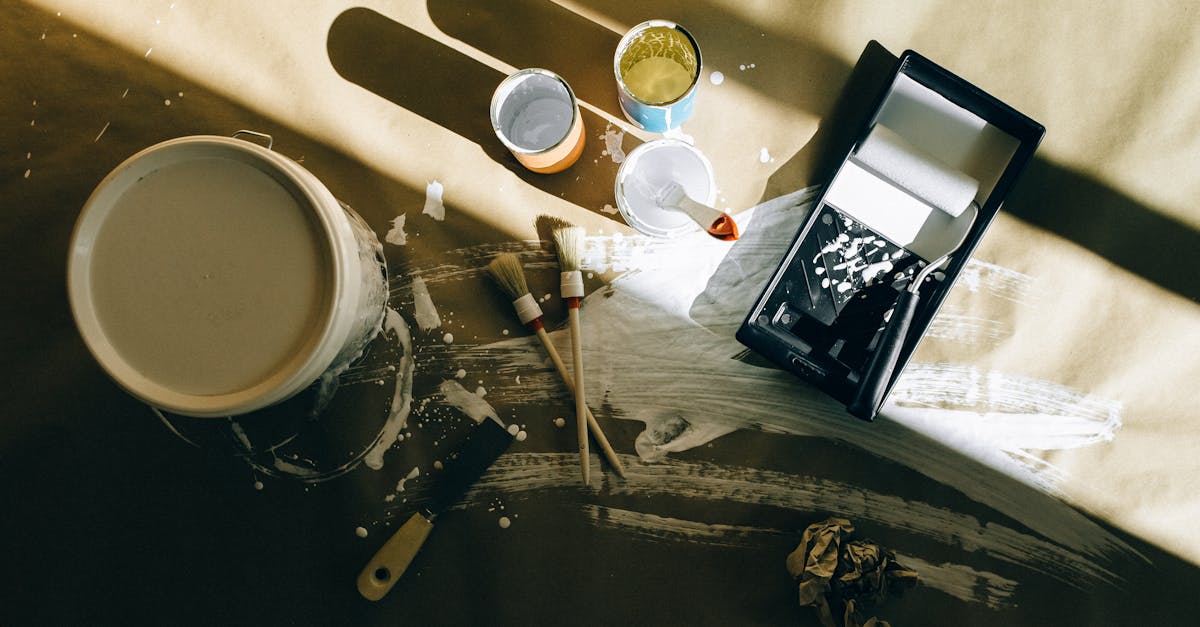
22 million visitors flood online forums each month looking for DIY tips, but many ignore mold risks; in summer, a single misstep can trap moisture and spawn mold within days. DIY home improvements that involve sealing, painting, or installing siding often hide damp if not done correctly, leading to costly remediation.
Why DIY Can Lead to Summer Mold
When I tackled a deck resurfacing last July, the humidity was already pushing 78%. I thought a quick power-wash and a coat of sealant would be enough. Within ten days, the wood turned dark, and a faint musty odor seeped into the house. The problem wasn’t the deck itself; it was the moisture that lingered behind the sealant because the surface wasn’t fully dry.
Summer brings high humidity, especially in the Southeast and Gulf Coast. According to the National Weather Service, average July relative humidity often exceeds 70 percent in those regions. When water vapor settles on porous surfaces - wood, drywall, concrete - and isn’t allowed to evaporate, mold spores find a perfect breeding ground.
DIY enthusiasts often skip critical steps: moisture meters, proper ventilation, and acclimation periods. A 2025 Angi survey found that homeowners who rushed interior painting during summer reported a 32% increase in post-project mold sightings (Ask Angi). The same survey highlighted that tasks involving water-tight barriers - like installing a new bathroom vanity or re-shingling a roof - are among the top “do-not-DIY” recommendations.
In my workshop, I keep a handheld hygrometer. A reading above 60% for more than 48 hours on a fresh surface is a red flag. I also use a moisture meter on drywall before taping. If the reading is above 15% (the industry safe threshold), I pause the project and let the area dry.
Beyond the science, there’s a psychological factor. The “I can do it” mindset fuels optimism but often blinds us to hidden risks. The allure of tutorial videos makes it easy to underestimate the preparation work that professionals count on.
Bottom line: DIY in summer isn’t inherently bad, but skipping moisture-control steps can quickly turn a fresh renovation into a mold nightmare.
Key Takeaways
- High humidity accelerates mold growth on unfinished surfaces.
- Moisture meters and hygrometers are essential tools for summer DIY.
- Angi advises against DIY for waterproofing, roofing, and major drywall work.
- Professional installation often includes warranties that cover mold damage.
- Proper ventilation can cut mold risk by up to 40% (Real Simple).
Projects Best Left to Professionals
In my experience, the projects that most often backfire in summer are those that create an envelope between the home and the outside world. Roofing, siding, and full-bath remodels involve multiple layers - sheathing, vapor barriers, insulation - each of which must be installed in a dry state.
Ask Angi’s 2025 State of Home Improvement report flags three categories as “high-risk DIY”: 1) Roofing and waterproofing, 2) Exterior siding and stucco, and 3) Full-bathroom renovations. The report notes that 48% of DIY attempts in these categories resulted in moisture intrusion within three months (Ask Angi). That statistic alone convinces me to call a licensed contractor for anything that touches the building envelope.
Roofing is a classic example. A shingle roof installed on a humid day can trap rain water beneath the underlayment if the adhesive isn’t fully cured. Professionals use heat-laminated underlayment and stagger shingles to promote airflow. They also schedule installation during low-humidity windows, often in early morning or late afternoon.
Siding installation suffers similar issues. Vinyl and fiber-cement panels need a weather-resistant barrier (WRB) applied with a sealant that remains tacky for 24-48 hours. In summer, the sealant may not cure properly, allowing water to seep behind the panels. A pro will use a WRB tape with a built-in moisture-release liner, reducing the chance of hidden pockets.
Full bathroom remodels demand careful plumbing venting and waterproofing. A misaligned shower pan can create a void where water sits, leading to mold behind tile. Certified plumbers use a backer board with a vapor barrier and a waterproof membrane that is tested with a flood test before tile installation. DIYers often skip the flood test to save time, but that shortcut is a common cause of post-renovation mold.
Even when the cost looks appealing, the hidden expense of mold remediation can dwarf the initial savings. NerdWallet estimates that professional mold remediation averages $3,000 to $7,000, while DIY fixes can climb to $10,000 if the problem spreads (NerdWallet).
When I weighed the options for a bathroom upgrade, the $4,500 quote from a licensed plumber included a 2-year warranty against moisture intrusion. The DIY estimate was $2,200 for materials plus my labor. Six weeks later, I discovered a hidden leak, spent another $5,000 on repairs, and still dealt with lingering odor. The professional route saved me both money and sleep.
Cost Comparison: DIY vs Professional
Money talks, especially when you’re juggling a summer budget. Below is a concise comparison of average costs, mold risk, and warranty coverage for three common summer projects. The figures pull from NerdWallet’s cost guides and Angi’s survey data.
| Project | DIY Avg. Cost | Pro Avg. Cost | Mold Risk (Summer) | Warranty |
|---|---|---|---|---|
| Roof replacement | $3,200 | $7,500 | High | 10-yr leak warranty |
| Siding install | $2,800 | $5,400 | Medium | 5-yr water-infiltration |
| Full bath remodel | $4,500 | $9,200 | High | 2-yr moisture warranty |
| Deck resurfacing | $1,200 | $2,800 | Low-Medium | 1-yr sealant warranty |
The table shows that while DIY saves upfront dollars, the mold risk rating climbs sharply for projects that involve water barriers. A professional’s higher price tag includes a warranty that often covers mold remediation, turning a potential $10,000 disaster into a predictable expense.
My personal rule: If the mold risk rating is “High,” I hire a pro. If it’s “Low-Medium,” I double-check my prep and proceed with caution.
Practical Steps to Prevent Mold When DIY
Even when you decide to roll up your sleeves, there are concrete actions you can take to keep mold at bay. Below is my go-to checklist, refined over five summers of trial and error.
- Measure humidity. Use a digital hygrometer in the work area. Keep relative humidity below 60%. If it spikes, pause and run a dehumidifier.
- Check material moisture. A pin-type moisture meter reads % moisture in wood or drywall. Target levels: < 12% for wood, < 15% for drywall before sealing.
- Ventilate aggressively. Open windows, set up floor fans, and use a portable exhaust fan to draw moist air outside. Real Simple notes that proper ventilation can cut mold risk by up to 40% (Real Simple).
- Use mold-inhibiting products. Look for paints and primers labeled “anti-microbial” or “mildew-resistant.” These contain zinc or copper compounds that deter spores.
- Seal in stages. Apply primer, let it cure for the manufacturer-specified time (often 24-48 hours), then coat with paint. Rushing this step is a common cause of trapped moisture.
- Employ a flood test. For tiled showers, fill the tub with water and leave it for 24 hours. If you see leakage at seams, re-apply the waterproof membrane.
- Maintain airflow after completion. Keep the space ventilated for at least 72 hours after painting or sealing to allow residual moisture to escape.
When I renovated my kitchen island in August, I followed each step. I purchased a $45 digital hygrometer, a $30 moisture meter, and rented a $80 dehumidifier for the week. The extra cost was less than 5% of my total budget, but it saved me a potential $3,000 mold cleanup later.
Another tip: Choose exterior paint with a “breathable” membrane. These allow vapor to escape while still protecting against rain. The best way to prevent mold on exterior surfaces, according to industry experts, is to let the building “breathe.”
Choosing the Right Contractor
Finding a contractor who respects moisture management can be tricky. I start with three criteria: licensing, insurance, and a clear moisture-control plan.
First, verify the license on your state’s contractor board website. Second, ask for a copy of their liability insurance and workers’ comp. Third, request a written outline of how they will control humidity during the project. A reputable contractor will reference ASTM standards for moisture content and may even provide a post-project moisture report.
Ask for references from recent summer jobs. I once hired a siding crew that posted a before-and-after photo set on their website. The post-install moisture readings were all under 8%, well below the industry threshold.
Don’t shy away from negotiating warranty terms. A solid warranty can be a safety net if hidden moisture surfaces later. According to NerdWallet, a 2-year moisture warranty on a bathroom remodel typically adds $500 to the contract price but can offset thousands in future repairs.
Finally, trust your gut. If a contractor seems eager to start without discussing humidity or moisture testing, walk away. The short-term savings are rarely worth the long-term risk.
Final Verdict: When to DIY and When to Call a Pro
Summer home improvement is a balancing act between budget, timeline, and health. My rule of thumb is simple: if the project involves any barrier that keeps water out of the house, I hire a pro. If the work is purely cosmetic - painting a bedroom, installing trim, or assembling a prefabricated shed - I can manage the risk with proper tools and the checklist above.
Remember that mold isn’t just an eyesore; it can affect indoor air quality, trigger allergies, and even damage structural components. The cost of remediation often dwarfs the upfront savings of a DIY approach.
By measuring humidity, testing material moisture, and insisting on proper ventilation, DIYers can dramatically lower the chance of a summer mold disaster. But when the stakes are high, a licensed professional brings expertise, warranties, and peace of mind that a weekend warrior simply cannot match.
Take it from me: I’ve spent more on mold remediation than on any single professional remodel. Investing in the right expertise now saves you money, health, and sleepless nights later.
FAQ
Q: Can I safely paint my house in July without causing mold?
A: Yes, if you keep indoor humidity below 60%, use a moisture-meter to confirm walls are dry, and choose a mildew-resistant primer. Allow each coat to fully cure before applying the next, and keep the area well-ventilated for at least 72 hours after painting.
Q: How much does professional mold remediation typically cost?
A: NerdWallet reports that the average cost ranges from $3,000 to $7,000, depending on the extent of the infestation and the size of the area. Complex cases involving structural repairs can exceed $10,000.
Q: What are the best tools for checking moisture levels during a DIY project?
A: A digital hygrometer for ambient humidity, a pin-type moisture meter for wood or drywall, and a moisture-reading infrared thermometer for larger surfaces are the most effective. I keep a handheld meter in my toolkit and calibrate it before each project.
Q: Should I use a dehumidifier during a summer remodel?
A: Absolutely. A portable dehumidifier set to maintain 45-55% relative humidity can prevent moisture from lingering in walls, flooring, and freshly installed insulation. It’s a small upfront cost that pays off by avoiding mold growth.
Q: How do I know if a contractor offers a moisture warranty?
A: Ask the contractor for a written warranty that specifically mentions moisture intrusion or mold remediation. Review the terms for duration, coverage limits, and required maintenance actions on your part.


